Ready to get started with Optimizely’s brand new SaaS CMS? Here’s one way to do that.
Table of contents
Open Table of contents
What’s the deal?
If you at all monitor the enterprise CMS space, you probably know by now that Optimizely (the place I work, to be clear) has just released our brand new SaaS CMS. (When I say “brand new”, I just mean our SaaS offering of the CMS — it’s the same underlying code as our long-existing, industry-leading PaaS CMS.)
There are a lot of helpful articles and blogs about it — check some of them out on Optimizely World. This blog post isn’t intended to walk through the benefits of Optimizely’s SaaS CMS offering, or the new features (such as the brand new Visual Builder). It’s just a quickstart guide to get a new SaaS instance, including test content and website front-end, up and running.
Prerequisites
The main prereq is a SaaS instance — it’ll also come with an Optimizely Graph instance (our GraphQL API hosted via Cloudflare edge).
For this setup, you also need:
- GitHub account
- Vercel account
Back-end setup (AKA CMS Setup)
Once you have your instance, the initial setup is similar to: https://github.com/episerver/cms-saas-vercel-demo/blob/main/docs/cms-config.md (note: as of this writing, that sample site repository is still being updated to handle the new Visual Builder).
-
Import the content pack: Download the content file “MoseyBank.episerverdata” from my SaaS instance here
-
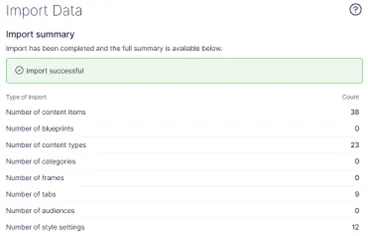
Import the file into the CMS: CMS > Settings > Import
- Content destination: Root
- Include all languages
Your results should be similar to mine:
-
Configure an API client for the front-end to use: CMS > Settings > API Clients
- Client ID: frontend [note: you can use anything you want here]
- Client secret: will be auto-generated
- Allow the client to impersonate users: TRUE
Then click “Create”. Be sure to copy and save your Client Secret – you won’t see it again!!
Front-end — initial setup
-
Log in to Github
-
Go to the existing repo: https://github.com/episerver/cms-visual-builder-vercel-beta
-
Fork the repo to your account by clicking the “Fork” button in the top-right
-
Create a new text file on your computer with the properties detailed in the README. A few notes:
- Several of the values will come from your CMS instance > Dashboard.
- “OPTIMIZELY_GRAPH_GATEWAY” should be: https://cg.optimizely.com/ (not the beta URL)
- “OPTIMIZELY_CMS_URL” – URL for your CMS instance, including the “https://” but NOT including a trailing slash
- “OPTIMIZELY_CMS_CLIENT_ID” and “OPTIMIZELY_CMS_CLIENT_SECRET” are the API client details you created during the backend setup above
NOTE: this file should NEVER be checked into your Github repository, as it contains private information.
Set up the front-end with Vercel
- Log into Vercel
- Create new project > select Github repository for your fork of the original solution
- Open the file created in step 4 above in a text editor, select all of the content, and copy it (ctrl-c)
- In Vercel, expand the “Environment Variables” section – put the cursor in the first box, and hit paste (ctrl-v). This should fill in all of your env variables.
- Update the SITE_DOMAIN variable for Vercel deploy:
- SITE_DOMAIN should be “$NEXT_PUBLIC_VERCEL_PROJECT_PRODUCTION_URL” (without the quotes)
- Click “Deploy”
- Verify the build is succesful
- Configure the Application and hostname in the CMS, now that you have a Vercel domain for the project:
- Go to the project page in Vercel to get the domain –- be sure to use the regular domain, NOT the “Deployment” domain.
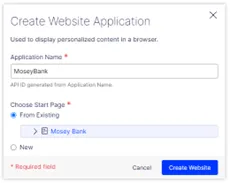
- In the CMS, go to Settings > Applications > Create
- Application name: MoseyBank
- Start Page: choose the “Mosey Bank” homepage imported earlier
- After creating the application, configure the hostname:
- Hostname from vercel
- Locale: “en” (without this, you must include “/en” in your URLs)
- Run the Graph indexing job: CMS > Settings > Scheduled Jobs > “Optimizely Graph Full Synchronization” — click “Start”
- After the job has completed, redeploy the frontend in Vercel.
So, what now?
Annnnd that should be it — you should now have a SaaS CMS site up, complete with brand-spanking-new Visual Builder feature in addition to on-page preview and all the other great features you’d expect from Optimizely’s CMS.
Not gonna lie, I wrote this up after a few birthday beers (sidenote: a company that doesn’t acknowledge 15 years of service probably also won’t acknowledge silly things like birthdays), but the instructions should be complete + accurate — I’ve run through it with multiple Github and Vercel accounts, and was succesful in each attempt.
That said — having issues with the setup? Leave a comment here, or reach out to me or the product team and Optimizely OMVPs on Slack.